Overview #
The WooCommerce Admin Orders List plugin allows you to customize the WooCommerce admin order list, i.e., the list view of the WooCommerce Orders page. (Dashboard > WooCommerce > Orders). It allows you to add custom columns, customize the status menu, and change columns order.
Enabling Admin Orders List #
To enable and use the Admin Orders List plugin, you should first download and install Booster for WooCommerce.
1. Navigate to WordPress Dashboard > WooCommerce > Settings > Booster > SHIPPING & ORDERS > Admin Orders List.
The Admin Orders List Module Options page will be displayed.
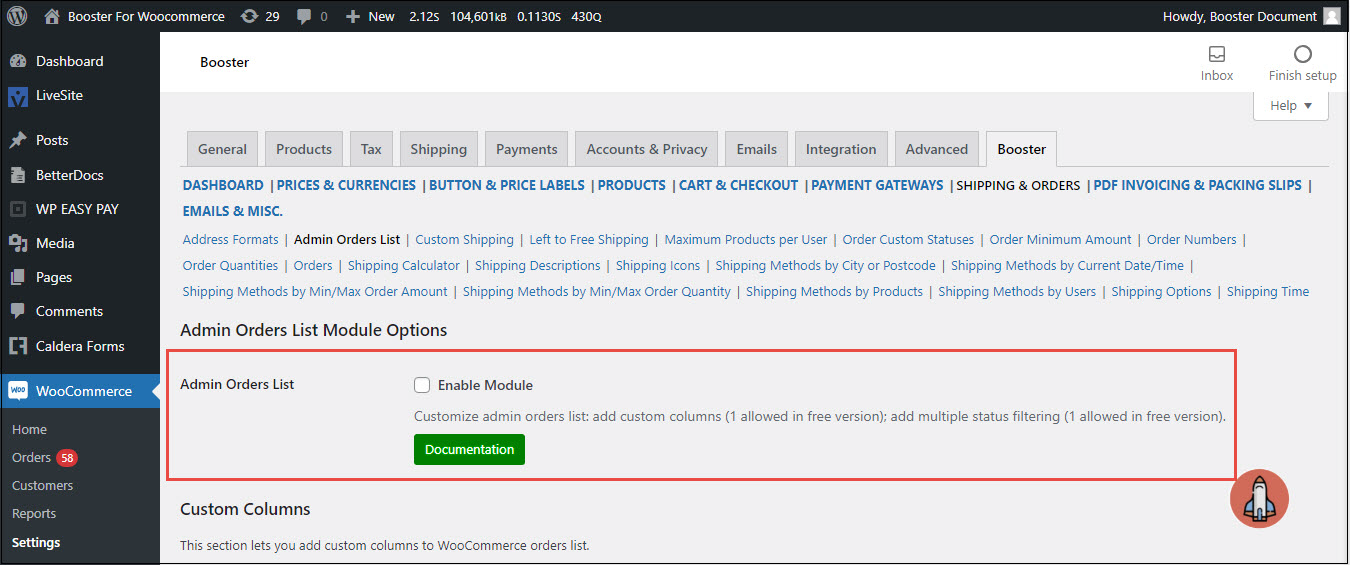
2. In the Admin Orders List section, check the box for Enable Module field.
3. Scroll down to the end of the page and click Save changes.
The WooCommerce Admin Orders List plugin will be enabled for your site.
Configuring Admin Orders List Settings #
You can customize the list view of the WooCommerce Orders page using this option.
You can add custom columns to the WooCommerce Orders page along with other options including setting the sortability of the custom column, adding billing country and currency code as custom columns, enabling filtering based on billing country and currency code, and so on. You can also customize the status menu with options such as setting multiple status filtering, hiding default statuses menu, adding presets to the admin menu, and so on. Finally, you can change the order of columns on the Orders page.
1. Navigate to WordPress Dashboard > WooCommerce > Settings > Booster > SHIPPING & ORDERS > Admin Orders List.
The Admin Orders List Module Options page will be displayed.
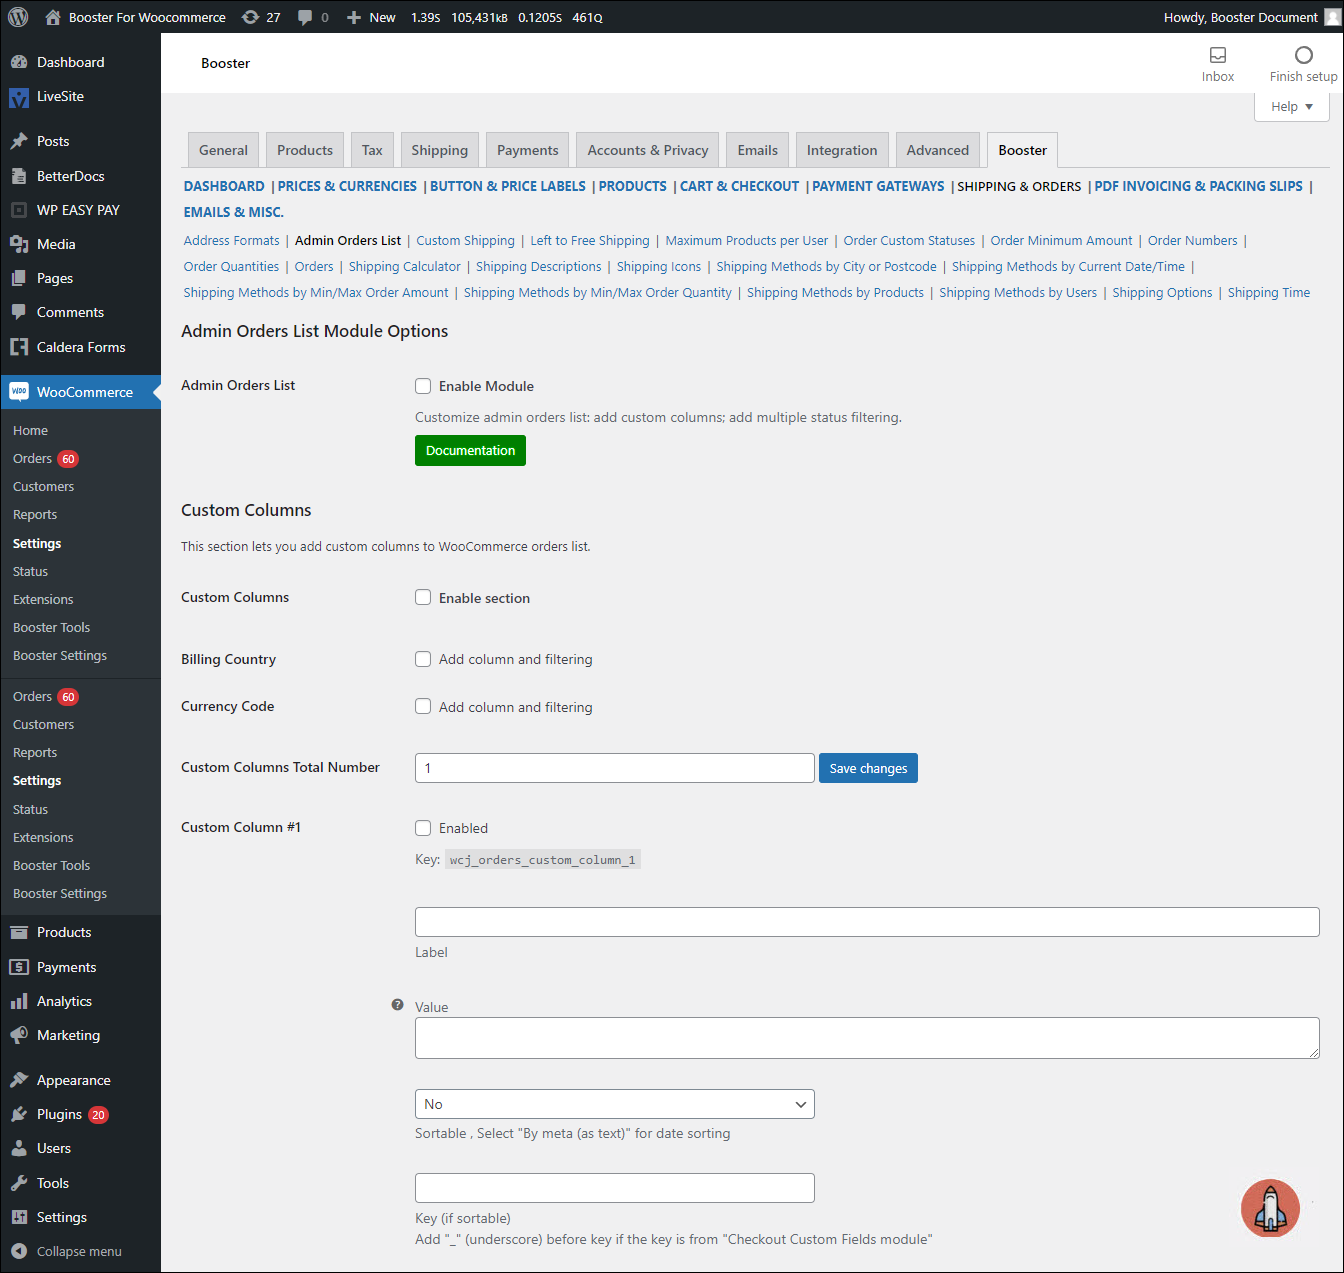
2. In the Custom Columns section, enter/select required values for the fields. Refer to the table below for field descriptions:
| Field | Description |
| Custom Columns | Specifies if customized columns are added to the Orders page |
| Billing Country | Specifies if the column Billing Country is added to the Orders page and if filtering based on the column is enabled |
| Currency Code | Specifies if the column Currency Code is added to the Orders page and if filtering based on the column is enabled |
| Custom Columns Total Number | Total number of customized columns added to the Order page. After entering a value for this field, click the Save changes button next to it. |
| Custom Column #1 – Enabled | Specifies if the custom column is added to the Orders page |
| Custom Column #1 – Label | Name/title of the custom column |
| Custom Column #1 – Value | Value of the custom column. You can use shortcodes and/or HTML here. |
| Custom Column #1 – Sortable | Specifies if the customized column data is sortable; if so, the basis of sorting. The available options are:No – Column data is not sortableBy meta (as text) – Column data is sorted by date. To sort column data by date, select this optionBy meta (as numbers) – Column data is sorted as numbers |
| Custom Column #1 – Key (if sortable) | Key of the customized column. Note: If the key is from the WooCommerce Checkout Custom Fields plugin, then add _ (underscore) before the key. |
3. To configure multiple statuses, scroll down to the Multiple Status section.

4. In the Multiple Status section, enter/select required values for the fields. Refer to the table below for field descriptions:
| Field | Description |
| Multiple Status | Specifies if multiple statuses are enabled |
| Multiple Status Filtering | Specifies if filtering based on multiple statuses is enabled; if so the basis for filtering. The available options are:Do not add – filtering based on multiple statuses is not enabledAdd as multiple select – Statuses will be displayed as a dropdown listAdd as checkboxes – Statuses will be displayed as individual checkboxes |
| Hide Default Statuses Menu | Specifies if the default statuses menu is hidden |
| Add “Not Completed” Status Link to Default Statuses Menu | Specifies if the Not Completed status is added to the default statuses menu |
| Add Presets to Admin Menu – Add Presets | Specifies if presets are added to the Admin menu. Note: To add presets, the Multiple Status Filtering option must be enabled. |
| Add Presets to Admin Menu – Add order counter | Specifies if the order counter is added to the Admin menu |
| Add Presets to Admin Menu – Remove original “Orders” menu | Specifies if the original Orders menu is removed from the Admin menu |
| Total Presets | Total number of presets added to the Admin menu. After entering a value for this field, click Save changes. |
| Total Presets – Title | Title of the preset added to the Admin menu |
| Total Presets – Statuses | Status(es) added to the preset |
5. To customize the column orders, scroll down to the Columns Order section.

6. To enable the ordering of columns, check the box for Columns Order field.
7. Enter the column names if the order in which you want them to be displayed on the Orders page. Enter one column name per line.
8. Click Save changes.
The Admin Orders List will be configured.
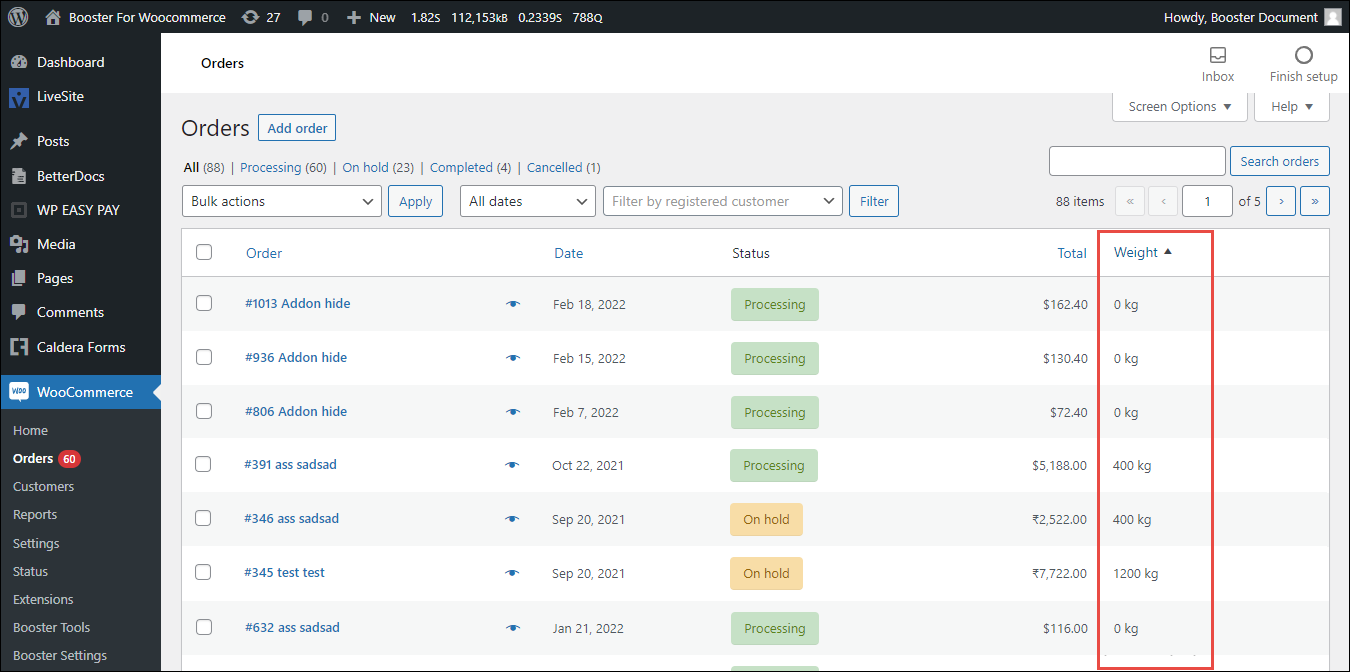
Output 1 #
A sample Orders page with a sortable custom column Weight is shown in the below screenshot:
Output 2 #
A sample Orders page with multiple statuses enabled and displayed as checkboxes is shown in the below screenshot:


